If you want to enjoy the full advantages of a rifle scope, you must be aware of adjusting a rifle scope flawlessly and adequately. It takes a complete understanding of the rifles, scopes, and which scope is perfect for your rifle.
If you are new to this field and do not know how to mount a rifle scope, adjust its components the best way possible, make adjustments in brightness settings and magnification, and answer all other questions about the proper procedure of a rifle scope adjustment?
I had to face all these questions myself when I was new to shooting, and now as a senior shooter and shooting guide, with the experience of years, and after studying a lot, I was able to prepare this extensive guide to solve your riddles relating to adjustment of scope properly.
It seems impossible to say that I know everything about a rifle scope adjustment; even if you are an experienced shooter, there must be some technicalities you may not know.
Here you find all about how to adjust a rifle scope for eye relief and clarity. Read this article and get all your answers in one go.
10 Steps for How to Set Up a Rifle Scope without Shooting?
To start, you need to know the basic terminologies, equipment, and tools used in a rifle scope. This knowledge puts your scope is in safe hands and will get the best placement on your rifle. Before heading towards steps for adjusting a rifle scope, let’s develop a basic understanding of the tools and terminologies used in scopes and rifles.
1) Terminologies and Components used in Rifle Scope:
Here is the list of some commonly used terminologies and components whenever we talk about how to adjust a rifle scope.
2) Magnification Adjustment:
For different shooting conditions, you adjust the scope’s image by adjusting the magnifier power; you get the zoom in and zoom out options to use for a clearer vision.
3) Scope Body:
This is the central part of the scope, where every other component, including tube, lens, articles, and all others, are attached. It’s called scope body.
4) Ocular Housing:
The eyepiece of the scope sometimes manages houses of the ocular and its adjustment.
5) Ocular lens:
When you look through the scope, the lens closest to your eyes is an Ocular lens. Keep your scope’s lens covered with a lens cap.
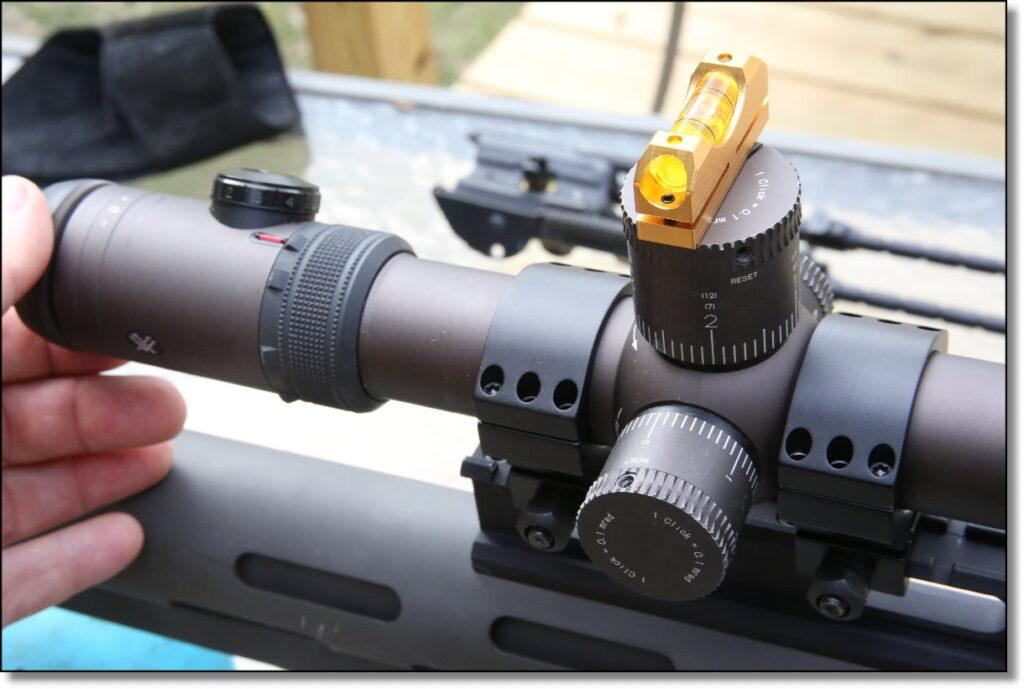
6) Turrets:
This is the part used to adjust the windage and elevation of the scope. Usually, these are exposed, easily adjustable.
7) Reticle:
This is the point that enables the shooter to aim for a target. Reticle performs a vital role in providing brighter and more precise vision with the help of magnifier adjustment.
8) Parallax Adjustment:
This adjustment helps in providing the target image to the FFP. It makes sure there is no shooting between the two objects you are focusing on. It is a knob on one side of the scope and can easily be adjusted by using it.
9) Crux:
To achieve the optimum performance from your rifle scope, all you have to do is follow these ten steps thoroughly. This guide will turn the tables in your favour altogether. Even if you are not an excellent shooter, still you can shoot much well than many others around you.
This guide contains experience of more than ten years. So, feel free to follow this step by step; it can also be taken as a benchmark for how to adjust a rifle scope for shooting.
Top Rated Scopes for Rifle | Detailed Review
- Scope for Ruger 10/22
- Rifle Scope Under 300
- Scope For 338 Lapua
- Scope For 308
- Muzzleloader Scope
- Scope for AR 15
- FFP Scope for the Money
- Scope for Henry Big Boy 44 Magnum
- Scope for Remington 700 SPS
10 Steps for How to Set Up a Rifle Scope for Clarity?
This ten steps guide will make you a master of rifle scope adjustment for sure. Because I Have explained all the major points one should follow while adjusting a rifle scope.
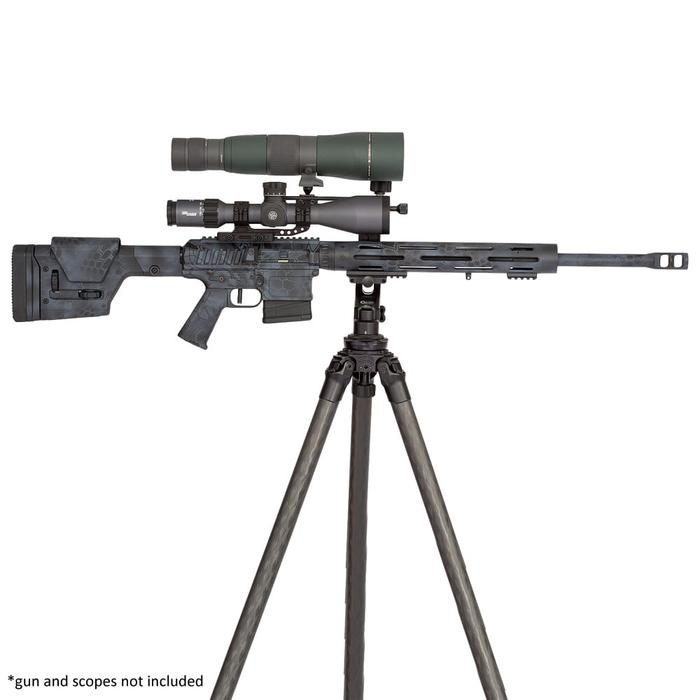
1) Install Your Scope Properly
Rifles have different fitting systems for scopes, and you need to know whether your rifle has a grooved rail system or pre-drilled holes bases. In addition, it helps you understand the adjustment of the scope rings and mount flawlessly because different rifles keep different mount and ring settings to make them fit in for a great shooting experience.
So, make sure your scope fits appropriately on your rifle grip, and they make a good match. If you can do so successfully, consider half of the task is done. And the other half allows you to adjust the settings as you feel good and comfortable.
2) Adjust the Level
Once you are done with successfully installing the scope with your rifle, the second step for adjusting a rifle scope comes, altering the right level for shooting. Whether you need a mount or a bipod to create the right level for having a good position on your target, you can also use a shooting bench to play the best shooting shots, and it gives you extra comfortability in levelling up with your rifle scope.
However, make it good first if you do not feel a levelling position with your rifle scope. Studies proved It increases the chances of your success up to 95% of placing the round right on the target. Moreover, you need to pick the right scope, as choosing the one out of so many available in the market is challenging.
3) Setting the MOA Properly
You need to follow a multi-step strategy to set zero. For example, when shooting in 100 yards, some rifle scopes allow you to adjust the Crosshairs in MOA ¼, which equals to ¼ movement per click. However, some hunters use ⅛ inch per click.
If you want to place the round faultlessly in 100 yards, you need to push the one MOA to get the accurate shot. You should also shift the windage and elevation knob to 4 clicks to create a balanced equation. After every 100 yards, the click value changes positions by ¼ inches.
The best combo options for different distance shootings you can use are 200 yards with ½ inches, 300 yards with ¾ inches, 400 yards with 1 inch, and it follows the same proportional growth on both sides.
4) Align the Reticle in the Right Direction
Often, it is seen that the shooters do not take the alignment of the reticle seriously while making it zero. Ultimately, it causes the imbalance of the windage and elevation with crosshairs adjustment. And this case pushes your shot to an unknown and undesired location, especially if you are shooting from a distance of more than 250 yards.
Ultimately, due to this wrong alignment, often you get to miss your targets. So, before you shoot from a long distance, you need to align the reticle in the right direction to make a good match with windage and elevation adjustment.
5) Windage Adjustment
Windage adjustment plays a vital role in influencing the bullets left to right. So, when you adjust the scope conditions to set it on zero, you must keep in mind the windage adjustment that significantly impacts the bullet shifting and makes your targeting go the right way you want.
So, keep a sharp eye on the windage setting, and before you place a shot, assess the wind flow, which helps you adjust the windage turrets accordingly, and you can get your target down quickly.
6) Set Your Eyepiece
Once you have placed your scope in a good position by mounting it on your rifle, go behind it and take a comfortable position. If you have to move your head to see through your scope, you haven’t mounted your rifle scope to fit your position. Fix it first, and mount it perfectly all over again.
Now, look at the objects at a considerable distance from you, close your eyes for some seconds, open them, look at the reticle, and close them. This exercise will help you assess the eyepiece adjustment in a good position and get you a sweet spot for a much clearer and easier view.
7) Magnification Adjustment
A ring is used just in front of the Ocular housing to adjust the magnification of the scope. It helps you in mid to long-range shootings immensely. Usually, Nightforce scopes are complex in adjusting the magnification, and you have to rotate the whole ocular housing for that. So I would not recommend the Nightforce scope at all. And I’m not too fond of it myself as well.
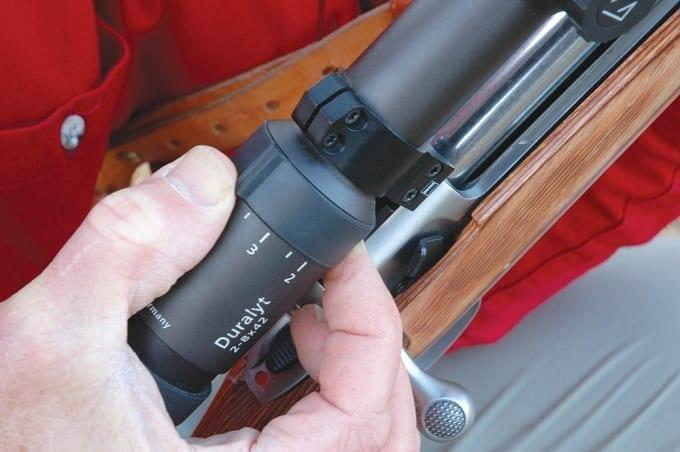
Magnification adjustment plays different roles for FFP and SFP accordingly. However, it fully supports the FFP scopes because the magnifier adjusts itself accordingly when you change the reticle.
And this rare combo helps you have the best and most transparent image of the target, especially if it’s at a long distance from you.
In SFP scopes, you get the fixed magnification setting. But, it doesn’t allow you to improve the adjustment settings as you feel good. So, always select the one backed by FFP, mainly if you aim for long-range shooting.
8) Bore Sighting
Before you load your rice for shooting, check this out by doing boresight. Just stand behind the rifle, look through the bore, and adjust the level as it fits. It helps you save your rounds and gives you the self-confidence to rectify things the way you want.
9) Head to the Range
The best way to shoot right on the point is to try different positions.It helps the shooter understand the secret behind a successful shooting practice. And if you are using a firearm, never go without safety equipment.
Always use eye protection, ear protection, and maintain a reasonable distance from the rifle’s body. You should arrange all this before you shoot your first round.
10) Fire Three Shots & Keep Tweaking
Fire three group shots, and assess whether the rounds land on the targets or not. If you find any considerable gap between the desired and actual shots, you need to adjust the settings as your MOA allows you to adjust the target.
Now, try different adjustments, keep tweaking until you get the desired targeting sight.
Installation of scope to its use, this process requires a considerable learning process at the backup. Resultantly, shooters get the desired target down. This is how to adjust a rifle scope for hunting.
Top Rated Rifle Scopes | Honest Review
- Best Night Vision Scope
- Scopes for a 30-30 Marlin 336
- Scope for 300 Win Mag
- Scope for AR 15 Coyote Hunting
- Scope for 223 with Bullet Drop Compensator
- Tripod for Spotting Scope
While setting up a rifle scope, there are numerous adjustments, but the primary three are Elevation, Windage, and Parallax adjustment. All three must be adjusted before shooting for having the most refined shooting and hunting experience.
Usually, rifles have ¼ MOA adjustment, which means after every 100 yards, one-click will push the bullet impact a quarter of an inch.
The specification of a rifle contains two numbers, the first one represents the magnification range, and the second one identifies the objective lens diameter.
It is an adjustment to compensate for shifting the vision due to wind to ensure that the shooter places the round right on the target; this adjustment is used.